Stop 114A: a Malaysian Internet Blackout initiative
Technorati tags: CIJ, August 14 Internet Blackout, Evidence Act, Amendment 114A UPDATED at 1757hrs: Thanks to the guys at Cari.com Walski has updated this post, which now includes instructions for Wordpress blogs as well Blogger-based ones originally posted. Recently, an amendment to the Evidence Act 1950 was passed in both houses of Parliament. It’s called Section 114A – “Presumption of Fact in Publication”. And it is a BAD piece of legislation. The Center for Independent Journalism (CIJ) has put together an initiative to raise awareness of why this is a bad piece of legislation, consisting of, among other things, a purpose-specific blog, an ongoing awareness campaign, a public forum (this Saturday, August 11), and an Internet Blackout Day. Similar to the SOPA/PIPA protest blackout, participating websites and blogs will be “blacked out” – displaying a pop-up stating the website/blog’s participation in the blackout initiative, with links to find out more about Amendment 114A, and social media connectors to ‘Like’ on Facebook. You can see an example of this pop-up in action here. Unlike the SOPA/PIPA blackout, however, the website/blog will still be fully functional once the pop-up is closed. myAsylum is committed to help out in this initiative with its limited resources, and yes, we will be participating in the August 14 Internet Blackout exercise. We will, however, go a couple of steps further – change the blog header (already done), and display one and only one blog post on the main page on August 14th, talking about Amendment 114A. If you have a Blogger or Wordpress-based blog, you, too, can participate by following the instructions Walski has provided in the full post. But before you do anything else, please send an e-mail to CIJ Malaysia letting them know that you would like to participate, providing them details of your website or blog. They will send you back code to implement the pop-up. Be sure to tell CIJ whether you will implement the code on a website, or blog – this is important because the implementation is slightly different between the two site types. Every little participation helps with this campaign, and not having a website or blog shouldn’t stop you from helping. The instructions that follow for both Blogger and Wordpress-based blogs have been developed and implemented by the good folks at Cari.com.my, one of the websites that will be participating in the August 14 Internet Blackout. Instructions for Blogger blogs Step 1: Go to Blogger.com and log in to access your blog settings. Select your blog from the dashboard, which will bring up your blog overview page. Click on Layout as shown in the picture below. This will bring up the layout set-up page for your blog. Step 2: What you will do now is add a widget to one of the area sections, preferably in the footer section as shown above (although adding a new widget in any section works). Step 3: A new window will pop up for you to select the widget type. The type to use is the HTML/javaScript widget type. Step 4. Once selected, an edit window will appear for you to insert the script. You can name your new widget (optional), but bear in mind that naming a widget will cause the name you assign to appear as a heading in some templates. For the code to use, 3 language versions have been developed: English, Bahasa Malaysia and Chinese (with 3 different types of encoding). The “generic” code can be found at the following links: The code is "generic" in the sense that it assumes that the images required to make the pop-up work are uploaded to the root directory of your blog. For Blogger blogs, this is not possible. There are two workarounds to overcome this. The first is to host the image files on your some file-hosting service (such as Fileden) which allows direct URL access then modify the code to include the full URL of the two images required in the pop-up. Where the full URLs go are shown in the picture below (where the red boxes are). The full URL for the first image is: Once replaced, the script will look like what is shown in the image below (example shown is the English version script). If all this seems too complex, you can go for the easier second workaround: Walski has pre-modified the scripts for you, so all you need to do is to download the modified scripts from the following links (right click and do a Save Link/Target As): Instructions for Wordpress blogs There are 5 steps to configuring the pop-up on Wordpress blogs. The step numbers correspond to the marked up blog configuration page below. Step 1: Login to your blog's WP-Admin page, and click on the Appearance tab (on the left-hand navigation pane). This will bring up the Manage Themes page. Step 2: Click on Editor. This will bring up the theme text editor. If you have more than one theme active, be sure you select the correct theme. Step 3: From the Template selection pane (on the right hand pane), find the Footer (footer.php) entry, and click on it. This will bring up the footer code in the center pane. Step 4: Depending on what language you intend to implement the pop-up with, you can obtain the code from one of the following links: Copy the entire contents from the text area on the web page you selected above. Paste the code you copied on the line immediately before the </body> tag (which is located towards the end of the code cluster). If there is no blank line, place your cursor at the beginning of the </body> tag, and press the Enter key on your keyboard. The code has been pre-configured to retrieve the images required from a specific external location, so there’s no need to do any modifications to the script. Step 5: Finally, save the modifications by clicking the Update File button at the bottom of the center pane. And with that, you’re ready to roll! ~~~ End Of Instructions ~~~ The pop-up has been implemented at myAsylum reLoaded, the test blog that Walski uses for experimentation purposes, and the end-result should look like the image below. Your blog will continue to operate as per normal once you close the pop-up. As mentioned earlier, you will want to inform CIJ Malaysia that you wish to participate before going ahead and carrying out the implementation. Walski hopes that this post has been helpful, and he looks forward to seeing your blog or website participate. It’s an initiative aimed at ensuring the Malaysian cyberspace remains free from the possible effects of Amendment 114A to the Evidence Act. The possibility of unjust prosecution aside, there’s also the chilling effect – Malaysians will no longer feel safe to express their views freely, and therefore exercise self-censorship. In other words, the death of the Internet as we know it… click on image for larger view
(how to implement the August 14 blackout pop-up, in the full post)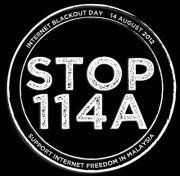 If you don’t have a website or blog, you can also help support the Stop 114A campaign on Facebook or Twitter, by changing your display picture to the one you see on the left (right click on the image, and do a “Save Link/Target As”).
If you have a Blogger-based blog, the following is how you implement the pop-up. We will only provide instructions for Layout-based Blogger blogs, but this should work with the old style templates as well. Also, you will need to be comfortable with modifying your blog layout. To be safe, always backup your template before you do any changes. Just to be sure.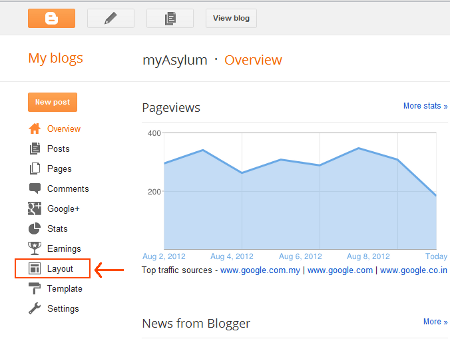
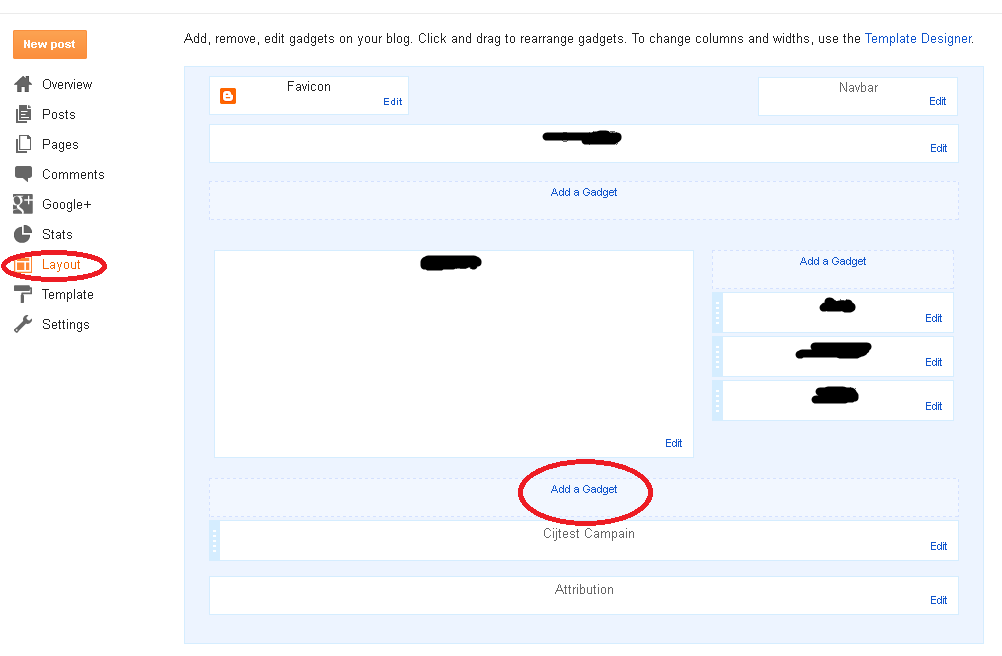

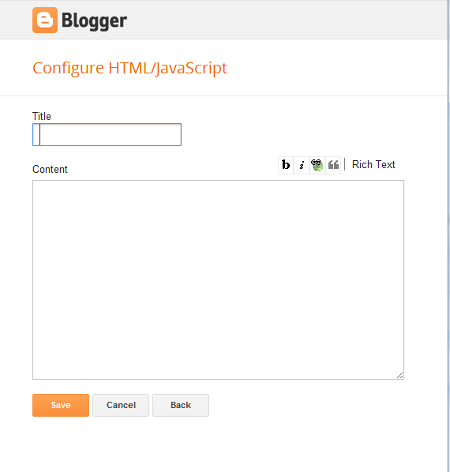
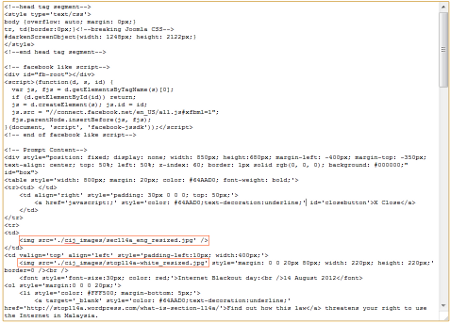 click on image for larger view
http://cari.com.my/cijtest/cij_images/sec114a_eng_resized.jpg (English)
http://cari.com.my/cijtest/cij_images/sec114a_bm_resized.jpg (BM)
http://cari.com.my/cijtest/cij_images/sec114a_cn_resized.jpg (Chinese)
while the URL for the second image is:
http://cari.com.my/cijtest/cij_images/stop114a-white_resized.jpg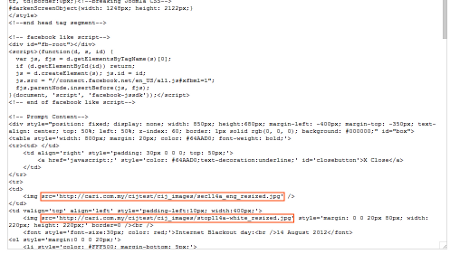 click on image for larger view
As with the Blogger-based blogs, you will need to be comfortable with tweaks to your blog template and layout, and just in case, be sure you back up your blog before commencing with the changes. click on image for larger view
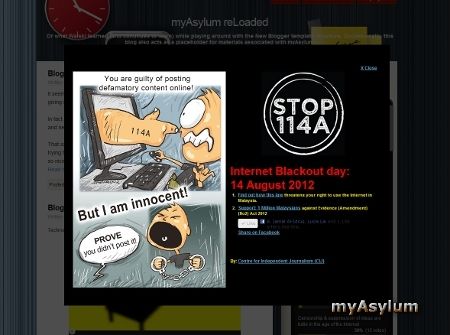 click on image for actual implementation view


